应用程序设置
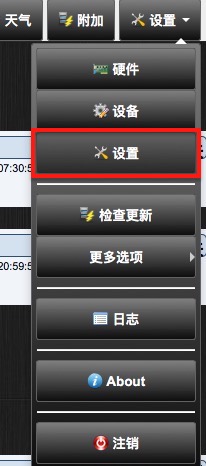
通过 设置>设置 菜单可以设置Domoticz程序
系统设置
设置中有很多选项卡,通过这些设置,可以让Domoticz更好的为你服务。更改设置后,必须点击右上角的红色"应用设置"按钮来保存设置。 此操作后,所有密码字段(即使没有被使用)将显示一长串星号!
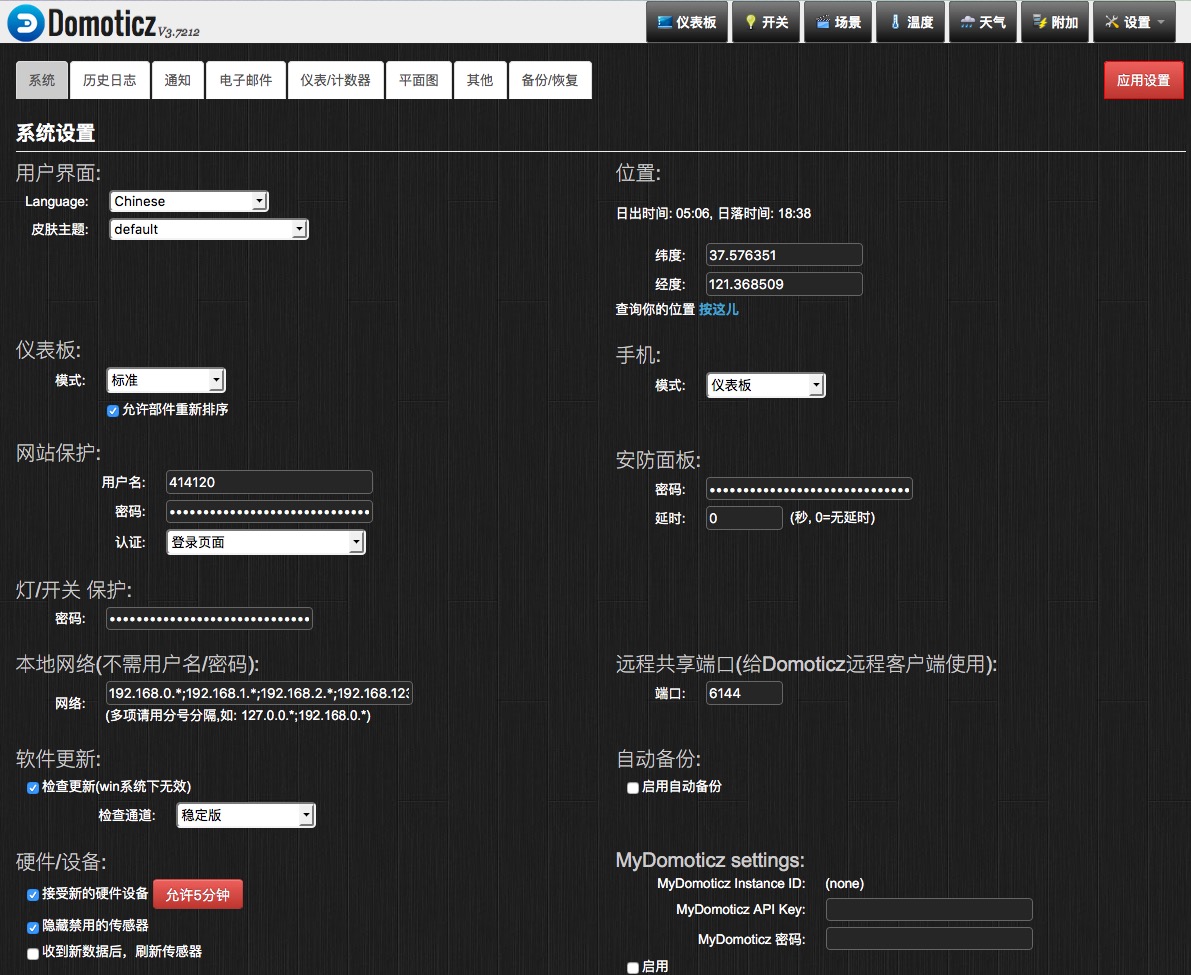
用户界面
在这里你可以设置显示语言以及主题。 Domoticz支持的语言数量正在迅速增长。语言更新请查看论坛。
安装后默认为英文,首次设置需要先填写地址经纬度,具体请看论坛帖子:Domoticz安装后无法切换中文显示的原因及解决方法
支持的语言:
| Arabic | Italian |
| Bulgarian | Lithuanian |
| Chinese | Macedonian |
| Czech | Norwegian |
| Danish | Polish |
| Dutch | Portuguese |
| English | Romanian |
| Finnish | Russian |
| French | Serbian |
| German | Slovak |
| Greek | Slovernian |
| Hebrew | Spanish |
| Hungarian | Swedish |
| Icelandic | Turkish |
地址
根据太阳起落来控制灯光开关设备,Domoticz需要知道你的地理位置。
位置设置需要你输入当地的经纬度,如果你可以正常访问谷歌,也可以通过点击“按这儿”来自动定位获取经纬度。如果你不能正常访问谷歌,请看论坛帖子:Domoticz安装后无法切换中文显示的原因及解决方法
仪表板
默认页面(仪表板)支持多种布局模式:
- 标准
- 紧凑
- 手机1
- 平面图
1) 在移动设备中 (iPhone/iPad/Android/…) 布局自动使用 ‘手机’ 模式
当“允许部件重新排序”选项被勾选时,你可以重新排列仪表板上的小部件
网站保护
默认情况下,通过浏览器访问Domoticz不需要输入用户名密码。
如果你想保护Domoticz (例如,如果您已经将端口与外界共享), 您可以设置访问系统需要输入的用户名及密码。
Basic-Auth will show a login popup whereas Login-Page will first show a webpage to enter username/password.
It is also possible to specify the #Local Networks that does not have to enter a Username/Password.
重置用户名密码
如果你忘记了用户名或密码,有两种方法来重置:
- 命令行中指定 –nowwwpwd 参数
- 在Domoticz根目录中新建一个名为‘resetpwd’的空白文件。
每分钟系统都会检查一次此文件,用户名及密码重置后此文件会被删除。
安防面板
The system has a security panel to specify if you are home/home-armed/away. You can use this as an alarm system. Here you can set the security code to change the arming state.
When you press arm on the security panel the default delay is set on 30 seconds before the alarm system becomes active. This can be modified.
When the password field has been completed a internal Domoticz device "Domoticz Security Panel" will be created and can be added as switch.
Internal Domoticz Security Panel
灯光及开关保护
If you want that an On/Off device be "protected", you can create a password that will be required by the system before executing commands, provided that you have ticked the "protected" box during the device editing phase.
本地网络
本地网络设置允许你设置信任网络来免密码登录Domoticz。网络地址允许使用通配符星号(*),要设置多个信任网络时请用分号(;)分隔。例如 192.168.1.*;192.168.0.*
远程共享端口
If you wish to share your sensors to other users, you can specify the remote port that Domoticz will listen on for remote connections. Consult your router for setting up a firewall/NAT rule to this port or check this howto.
软件更新
The Domoticz system can be updated (Raspberry Pi) via the web interface. There are two options:
- Stable versions (Recommended for production environments)
- Beta versions (Developer versions. These will appear when new features are added but may not be reliable yet.)
When a new update is available a green popup will show upon login:
Clicking "Click here" will show the list of changes so you can decide to install the update or not.
Clicking "Update Now" will update Domoticz to that latest release.
Update Popup
You can also check on a new version manually via the Setup|Update Domoticz button, that will instantly update your Domoticz software.
Update Domoticz
By clicking the current version number at the upper left side of every Domoticz page the list of changes for the current version will be shown.
Updates Overview
自动备份
当启用自动备份选项勾选时,系统会自动定期备份数据库,每小时向domoticz/backups/hourly/文件夹中创建一次备份, 每日备份位于domoticz/backups/daily/文件夹,每月备份位于domoticz/backups/monthly/文件夹。
手动备份还原数据库请查看#备份恢复数据库
硬件/设备
By default new devices will appear in the device list automatically. Untick Accept new Hardware Devices to prevent this.
When ticked disabled hardware devices will be hided in the devices list.
When ticked a sensor will flash when an update is received.
MyDomoticz settings [BETA]
The MyDomoticz service, as can be found on https://my.domoticz.com/, enables Domoticz users to access their Domoticz appliance (sometimes called an "instance") from outside their local network without having to forward a http port on their router or even knowing their IP address.
All communication occurs via a secure webpage and there is also no need to fiddle with certificates locally.
More details can be found on the MyDomoticz wiki page
Log History
With the Light/Switches parameter you can specify the amount of Log days that a Light/Switch will hold.
Every meter/sensor value will be logged each 5 minutes. By default 1 day of 5 minute logs will be kept and displayed in a graph when the log is requested. It is possible to enlarge this window to a maximum of 7 days, but keep in mind this will cost more hard disk space. Also when working remotely there is more data to be transferred resulting in a slower response.
Log History setup
Notifications
Notifications can be send for example when a switch is pushed, electricity usage is too high,temperature to high and for many more options.
The following notification services are supported:
- Prowl (iPhone/iPad)
- NMA (Android)
- PushBullet
- Pushsafer (iOS/Android/Windows10/Chrome/Firefox)
- Pushover (Android/iOs)
- Pushalot (Windows/Windows Phone)
- Clickatell SMS
- Custom HTTP/Action
- Kodi Media Player
- Logitech Media Server
- Google Cloud Messaging
The services settings the notification Intervals can be set for sensors and switches.
Notifications setup
If you enter your email details here, you can receive notification alerts, camera screenshots and error notifications.
The screenshot shows the settings used for sending mail through a gmail account.
Email Setup
Meter/Counters Setup
This section is used to tune Wind and Utility meters to your situation.
Wind Meter
Wind speeds can be displayed in either one of the units: m/s, km/h, mph or knots.
RFX/Meter Dividers
Some utility devices might use another basic scale for their meter (pulses/kWh for example). It is also possible to enter the costs for Energy, Gas and Water here. These values will be used when displaying reports. T1 is the night/weekend rate, T2 is the day rate.
OWL 113 display mode
By default the OWL 113 displays the electrical current in Ampere. It is possible to display this in Power (Watt). For this you need to supply the normal housing voltage.
P1 Smart meter type
Here you can select if the values of the P1 smart meter will be displayed with decimals or not.
Meter and Counter setup
Floorplan
Other Settings
This section contains various other settings.
Random Timer
This specifies the maximum time spread that randomness will provide when the randomness check box is selected within the Timers area of Switches and Scenes.
Example usage:
Select a spread time of 10 minutes, then enable the randomness check box within the Timers area of a particular Switch.
Set the Switch to turn on at 22:00 each day.
The end result will be that the Switch will turn on sometimes at 21:50, sometimes at 22:10, and at various other random times between these values. This is useful if you wish to make it appear that you are at home, and aren't actually automating the control of a Switch.
Sensor Timeout
Info needed!
Battery Low Level
Info needed!
Timer Plan
Info needed!
Doorbell Command
Info needed!
Raspberry Pi Camera Parameters
In this box special parameters to be used with the raspistill module for the RaspiCam can be added. These parameters are detailed here.
UVC Parameters
Info needed!
EventSystem (Lua/Blocky/Scripts)
When the Log 'event script triggers' checkbox is checked, the 'event script triggers' will be logged which was the default behavior. This logging of the 'event script triggers' can be disabled by unchecking the checkbox.
Other Settings
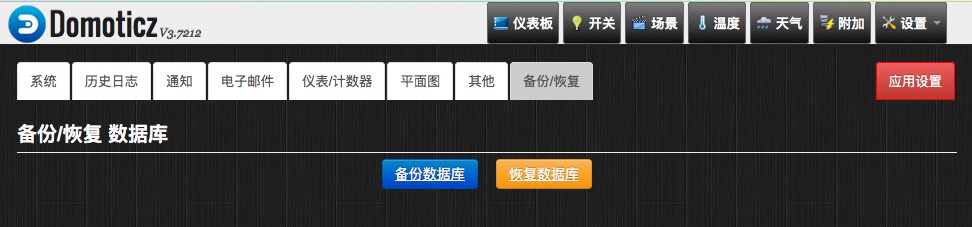
备份恢复数据库
这里你可以为Domoticz创建一个数据库备份,或者手动还原数据库。你还可以设置自动备份,请查看#自动备份。